
Blow Bar Selection by Feed Size: The Decision Guide
How to Select the Right Blow Bar Material: A Feed-Size-Based Decision Guide
The short answer is simple. Blow bar selection by feed size and crusher stage beats brand loyalty, sticker price, and hardness numbers every single time. Marcus Hale learned that the hard way. As the newly hired procurement manager at a Texas granite quarry, he specified the most expensive high chrome blow bars for his primary impact crusher because the vendor promised the best wear life. Within one week, three of those premium bars had cracked clean through. The plant sat idle for 38 hours while the team sourced replacements, and the emergency freight alone cost more than the original order.
Marcus made the mistake we see in quarries on every continent. He treated the hardest, most expensive bar as the best bar. He ignored the one variable that controls blow bar survival more than any other: how big and how hard the feed is, and which crushing stage the bar actually works in. A practical impact crusher blow bar selection guide has to start there, not in a metallurgy catalog.
You already know cheap parts fail fast and a snapped bar can wreck a rotor. You also know cost per ton is what matters at month end. This guide gives you a working framework: four gating factors (feed material, feed size and crusher stage, tramp iron risk, and your current failure mode) plus a decision matrix that maps each combination to a recommended material category. By the end you can choose blow bar material by feed size with confidence.
Key Takeaways
– The first rule of blow bar selection is survival: a bar that breaks is always worse than a bar that wears, no matter how cheap or hard it looked on paper.
– High chrome white iron is the wrong choice for primary crushing of hard, large feed because its toughness is too low for the impact load, even when its wear life is excellent.
– Feed size and crusher stage set the toughness requirement. Primary and large feed demand high toughness. Fine feed in tertiary and sand making lets you push wear resistance instead.
– Tramp iron and uncrushable objects force a toughness first decision. When rebar or steel can enter the chamber, give up some wear life to avoid a catastrophic break.
– Let your current failure mode diagnose the next step. Frequent breaks mean move up in toughness. Fast wear with no breaks means move up in wear resistance. Both at once means a composite design.
The Golden Rule: Breakage First, Wear Second
Every blow bar lives or dies by a single hierarchy. Make sure it does not break, then worry about how long it lasts. A bar that snaps mid shift does not just stop crushing. It can gouge the rotor, crack the impact apron, and turn a routine changeout into a multi day rebuild. Wear is predictable by contrast. You see it coming, schedule the swap, and the crusher keeps running.
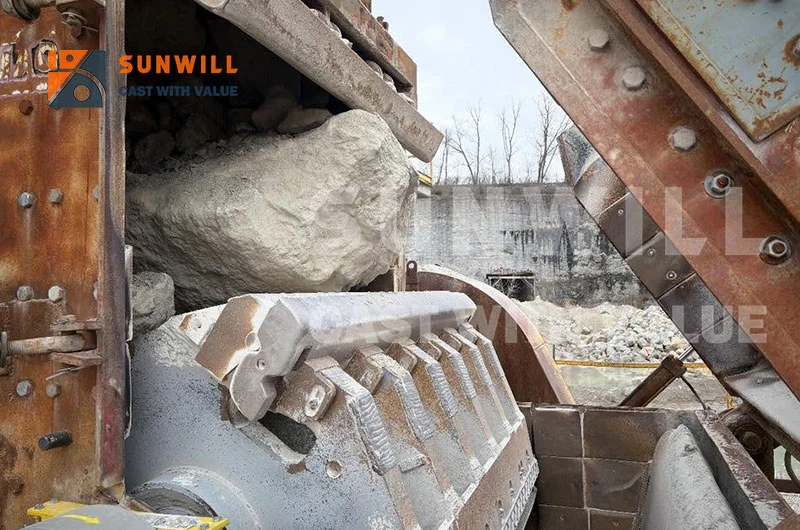
This is why toughness outranks hardness in the real world. High chrome white iron is extraordinarily hard and resists abrasion superbly, but its fracture toughness is low. When a 400 mm granite slab slams into a high chrome bar at rotor speed, the impact energy can exceed what the material can absorb. The bar does not wear out. It cracks.
The Texas granite quarry where Marcus worked was not unique. Two operations sixty miles apart ran the same primary impactor on the same gray granite. The first followed “hardest bar wins” and ran high chrome in the primary position, averaging a broken bar every nine days. The second took the breakage first view and ran a martensitic grade built for impact, with no fractures across just over six months of service. Same rock, same machine, opposite result, and the difference was toughness, not price.
The lesson is not that high chrome is bad. High chrome is excellent in the right place, which is almost never the primary position on hard rock. When you choose blow bar material by feed size, remember that the largest, hardest feed lives at the primary stage, and that is exactly where toughness must win. For the deeper metallurgy behind this tradeoff, see our blow bar material specs and composition comparison.
Decision Factor 1: What Are You Crushing? (Material Type)
Your rock decides the wear mechanism. Soft, low abrasion stone grinds slowly and lets you chase maximum life. Hard, silica rich stone attacks the bar on two fronts at once: high impact and aggressive abrasion. The selection window narrows as abrasion rises.
Limestone family (soft to medium abrasion)
Limestone is forgiving. Its abrasion index sits near the bottom of the scale, often around 0.001 to 0.03, roughly twenty five times lower than quartzite. With low silica and modest compressive strength, limestone lets you prioritize wear life with little breakage risk. In secondary and tertiary positions, high chrome or high chrome with ceramic inserts deliver the longest campaigns, while the primary position with large, slabby feed is safer on a toughness grade such as martensitic steel.
Granite and basalt (hard and highly abrasive)
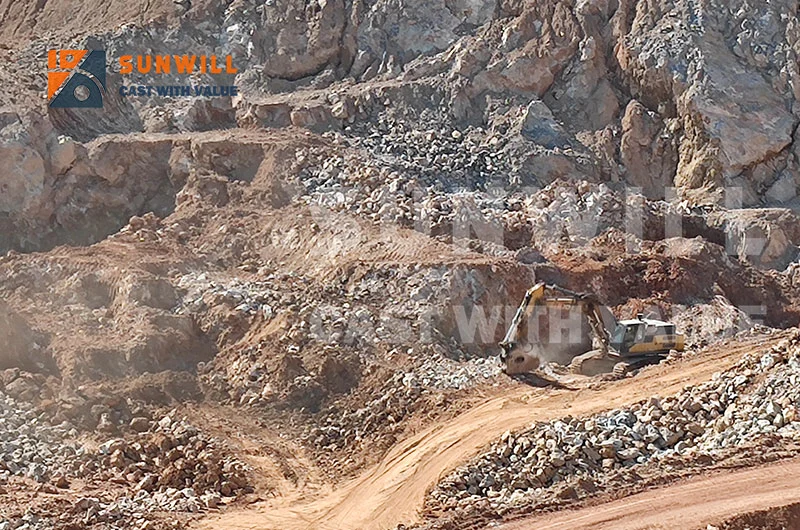
Granite and basalt are the opposite problem. Both carry high silica and high Bond Work Index values, with granite around 16 plus or minus 6 kWh/t and basalt around 20 plus or minus 4 kWh/t. They are dense, tough, and they abrade metal fast. This is the classic blow bar for limestone vs granite contrast: what works on limestone can fracture or vanish on granite. You need a balance of impact toughness and wear resistance from martensitic steel, martensitic with ceramic inserts, or the TiC reinforced high manganese line. High chrome can enter secondary and tertiary roles with controlled feed and low tramp risk, but it should never lead in primary granite. For a deeper look at hard rock setups, see our hard rock quarry blow bar guide.
River pebble (the abrasion king)
Rounded river pebble and cobble are deceptively nasty. The particles are smooth, so they do not shatter easily. Instead they tumble and grind, and their quartz content makes them among the most abrasive feed you will process. Wear life, not breakage, is the dominant constraint because the feed is usually pre sized with moderate impact. Ceramic composite bars, in a martensitic or high chrome matrix, earn their premium by stretching campaigns from weeks into months.
Concrete and demolition (rebar risk)
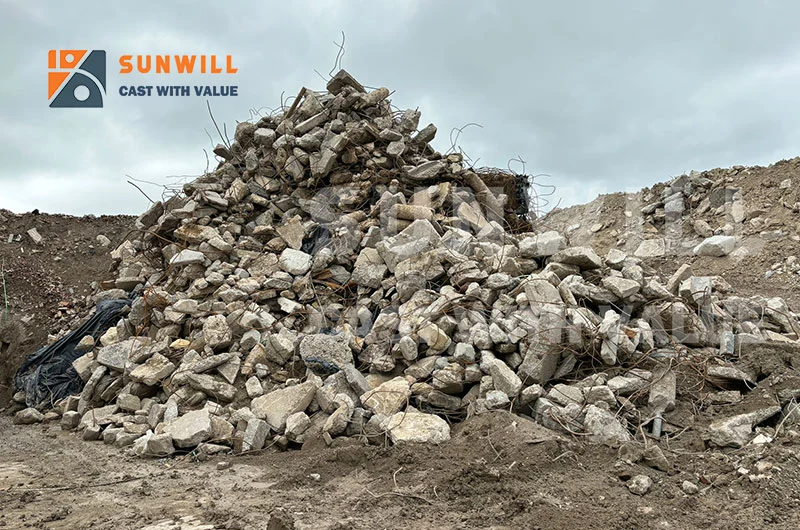
Recycled concrete and construction demolition introduce a wildcard: embedded steel. Rebar, mesh, and the occasional post tension strand are uncrushable. They demand a high toughness matrix first, with a ceramic or hard wear face layered on top to handle the abrasion. Bimetallic designs that pair a ductile backing with a wear resistant face are built for exactly this duty.
Material hardness and abrasion at a glance
| Material | Compressive strength (MPa) | Abrasion behavior | Primary selection pressure |
|---|---|---|---|
| Limestone | 30 to 150 | Very low | Maximize wear life |
| Sandstone / dolomite | 50 to 150 | Low to medium | Life with some toughness |
| Granite | 100 to 250 | High | Toughness plus wear balance |
| Basalt | 100 to 300 | High | Toughness plus wear balance |
| River pebble | 80 to 200 | Extreme | Maximum wear resistance |
| Concrete / C&D | 30 to 150 plus steel | Medium plus tramp | Toughness first |
Decision Factor 2: How Big Is Your Feed? (Feed Size and Crusher Stage)
Feed size and crusher stage are two sides of the same coin, and together they set your toughness floor. The bigger the rock entering the chamber, the larger the impact energy the bar must absorb. That is the heart of blow bar selection by feed size.
Crusher blow bar feed size limits by stage
Primary impact crushers accept the largest feed, commonly slabs from 300 mm up to 1000 mm and beyond, with some rated near 1500 mm. Secondary crushers drop to roughly 100 mm to 500 mm, while tertiary and sand making roles run fine feed, frequently under 150 mm and often under 50 mm.
These crusher blow bar feed size limits matter because oversized feed generates impact forces that exceed the design envelope of brittle alloys. A bar rated for secondary duty will fracture in a primary chamber not because it is a bad bar, but because it met the wrong impact load.
What blow bar for primary vs secondary crusher
This is the question every plant manager asks, and the answer is a sliding scale.
- Primary (large feed, high impact): Toughness leads. Martensitic steel or TiC reinforced high manganese handles the shock. High chrome stays out unless the feed is small and soft, such as pre screened limestone.
- Secondary (mixed impact and grinding): Balance wins. Martensitic with ceramic, or high chrome with ceramic where tramp risk is controlled, captures long life without inviting fracture.
- Tertiary and sand making (fine feed, grinding dominant): Wear resistance leads. High chrome with ceramic or a ceramic composite bar maximizes tons per changeout because impact energy is now low.
Feed size and blow bar thickness
Thicker bars survive larger feed. A primary bar is heavier and deeper than a tertiary bar because the extra section absorbs impact and resists the bending moment that cracks thin bars. When feed grows coarser than the original plant design, step up to a tougher, thicker grade before you chase hardness.
Decision Factor 3: Tramp Iron Risk (The Unbreakable Variable)
Tramp iron is the variable that ruins neat theories. A bar can be perfectly matched to feed size and material, then snap on the first piece of bucket tooth, crawler plate, or rebar that wanders into the chamber.
Ask two questions before you finalize the material.
First, do you have metal detection and magnetic separation in the circuit? A cross belt magnet and an inline metal detector catch most steel before it reaches the rotor. Plants with both can safely lean toward wear resistance. Plants without them cannot.
Second, how good is your pre screening? Efficient scalping removes fines and debris and keeps the chamber fed with sized material instead of surprises. Poor scalping raises the odds of an uncrushable lump landing flush on a bar.
When tramp risk is high, choose toughness on purpose. Give up some wear life to buy fracture safety. A martensitic base or a bimetallic tough matrix with a ceramic face will survive a stray steel object that would shatter a monolithic high chrome bar. The extra changeouts are cheap insurance against a destroyed rotor.
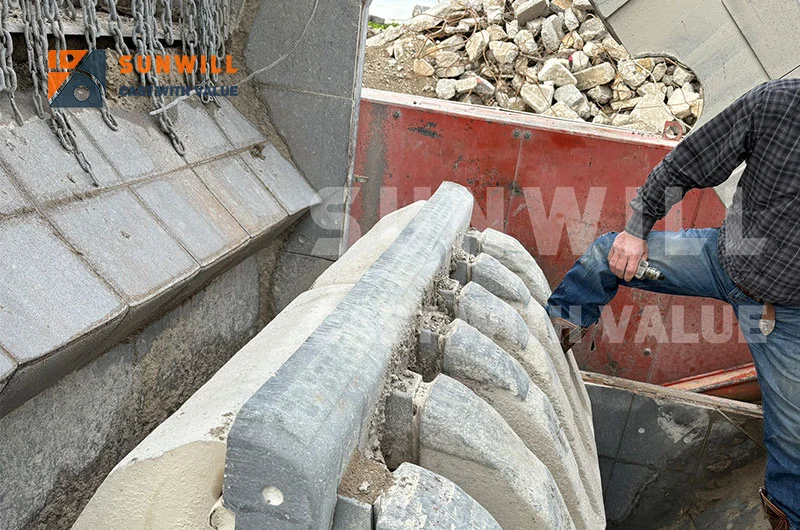
Riverside Recycling runs a concrete demolition line outside Columbus, Ohio. For two seasons they chased longer life with a hard ceramic rich bar, and every few weeks a buried rebar section cracked a bar and once bent a rotor lock. After a failure analysis they switched to a high toughness matrix with a ceramic wear face, a bimetallic design built for tramp exposure. Breakage stopped. Wear life dropped by about a fifth, but the eliminated downtime and rotor repairs paid that back within the first month. The right call was not the longest living bar. It was the bar that came back every shift.
Decision Factor 4: What’s Failing Now? (Diagnosis-Driven Selection)
Your current pain is the fastest diagnostic tool you own. Start from what your existing bars are doing, not a blank page.
If your problem is frequent breakage, the message is clear: you are under the toughness floor. Move up the toughness scale. Shift from high chrome toward martensitic, or from a mono alloy toward a bimetallic tough matrix. Confirm the feed is within the crusher limits before you blame the bar, because oversized feed will break even a tough grade.
If your problem is wear that is simply too fast with no breaks, you have headroom to add wear resistance. Step up to ceramic inserts or a higher chrome grade, but only after you confirm the impact load is low enough that the harder grade will not fracture. Adding hardness to a bar that is already breaking makes a bad month worse.
If you see both problems at once, breaks and fast wear, you need a composite answer. A ceramic wear face on a tough matrix targets abrasion where the bar meets rock while the backing absorbs impact. This is the zone where blow bar failure causes analysis pays for itself, because the fracture surface tells you exactly which load exceeded which property.
When symptoms are unclear, walk through our impact crusher wear troubleshooting guide to separate installation error, feed distribution, and rotor speed issues from true material mismatch. A bar rarely fails for only one reason, and the right fix is the one aimed at the real cause.
The Selection Decision Matrix (Core Value)
Use this as a gate, not a suggestion. Start at the top with your material, move to your stage and feed size, then apply the tramp and failure checks. The output is a material category, not a brand. Exact SUNWILL grade codes live in our blow bar material codes guide.
The gating flow in words
- Name the material. Soft limestone opens the wear life door. Hard granite, basalt, or river pebble closes it and demands balance or max wear.
- Name the stage and feed size. Primary and large feed raise the toughness floor. Tertiary and fine feed lower it.
- Check tramp risk. High risk forces a toughness step up regardless of wear goals.
- Read your current failures. Breaks mean tougher. Fast wear with no breaks means harder. Both mean composite.
- Match the result to the table below and confirm the grade code with the codes guide.
Quick lookup table
| Material | Stage | Max feed size | Tramp risk | Recommended blow bar category |
|---|---|---|---|---|
| Limestone | Primary | 300 mm to 1000 mm plus | Low | Martensitic, or TiC reinforced high manganese (independent line) |
| Limestone | Secondary / Tertiary | under 300 mm | Low | High chrome, or high chrome with ceramic |
| Granite / Basalt | Primary | up to 600 mm | Medium | Martensitic, or TiC reinforced high manganese (independent line) |
| Granite / Basalt | Secondary | under 300 mm | Medium | Martensitic with ceramic, or high chrome with ceramic if tramp controlled |
| River pebble | Secondary / Tertiary | under 150 mm | Low to medium | Ceramic composite (martensitic or high chrome matrix) |
| Concrete / C&D | Primary / Secondary | under 500 mm | High | Tough matrix with ceramic wear face, bimetallic |
A note on our boundaries. SUNWILL supplies high chrome, martensitic, ceramic composite, and bimetallic blow bars as standard programs, and offers TiC reinforced high manganese steel as an independent product line for high impact plus wear duties. We do not stock standard Hadfield manganese grades such as Mn13, Mn14, or Mn18, and reference them only as the traditional industry baseline. Ni Hard white iron to ASTM A532 is available by specify and source, not as a stock line, and tungsten carbide composite or overlay bars appear here only as comparison points against our composite programs.
Cost-per-Ton: Why Cheaper Blow Bars Often Cost More
Unit price is the most misleading number in wear parts. A bar that costs half as much but lasts a third as long, and breaks once, is the expensive option by a wide margin.
Total cost per ton is the honest metric. It folds in the bar price, installation labor, and downtime of every changeout, then divides by the tons crushed before replacement. A martensitic bar may cost more up front than a basic high chrome bar, yet beat it on cost per ton by avoiding a fracture shutdown and running longer in abrasive service.
Downtime is the line item most buyers forget. Every unplanned changeout pulls the crusher offline and idles the supporting plant. One catastrophic break that damages the rotor can cost more than a full year of premium bars. Ceramic composite upgrades often recover their premium through longer campaigns, with field data showing 5% to 10% higher throughput than mono alloy bars because the working edge holds its shape.
At SUNWILL we CAST WITH VALUE. That principle means we match the metallurgy to your exact feed, stage, and tramp exposure instead of shipping a generic bar. The goal is never the lowest invoice, but the lowest cost per ton your circuit can produce.
Common Selection Mistakes to Avoid
Buying the bar your neighbor’s quarry uses. Their rock, feed size, and tramp exposure are not yours. A grade that runs six months next door can fracture in a week in your primary if your feed is coarser or your screening weaker.
Choosing the hardest bar. Hardness without toughness is a fracture waiting to happen in any primary or high impact role. The hardest bar is the right bar only when impact energy is low.
Choosing the cheapest bar. Low unit price hides short life and frequent changeouts. The true cost shows up in cost per ton and unplanned downtime, not on the purchase order.
Ignoring feed size change. Feed gets coarser when blasting patterns change, when a screen panel fails, or when a new pit face comes online. A bar tuned for 150 mm feed will break on 400 mm feed. Recheck your feed size limits every time the circuit changes.
Skipping the failure diagnosis. Swapping materials without reading why the last bar failed just repeats the mistake in a different alloy. Let breakage or fast wear tell you which property to change.
Conclusion
The right blow bar is never the hardest or the cheapest. It is the one matched to your four gating factors: the material you crush, the feed size and crusher stage you run, the tramp iron risk in your circuit, and the failure mode of your current bars. Start with survival, then extend wear life, and let cost per ton, not unit price, judge the result.
Ready to pin down the exact grade for your circuit? Download the full SUNWILL blow bar material codes guide for the complete grade matrix, or contact our application team with your feed sample and crusher model for a written recommendation. We CAST WITH VALUE, and the first value we protect is your uptime.
setting the apron gap to spec## Standards and Authoritative References
- National Stone, Sand & Gravel Association (NSSGA) – US aggregate producer association; referenced for best practices on feed control and tramp material management in crushing operations.
impact crusher side liner wear
Frequently Asked Questions
How do I choose blow bar material by feed size for a primary crusher?
For primary crushing the feed is large and the impact load is highest, so toughness leads. Use a martensitic grade or a TiC reinforced high manganese bar for hard rock, and reserve high chrome for small, soft, pre screened feed such as limestone. Always confirm your actual maximum feed against the crusher rating before selecting hardness.
What blow bar should I use for limestone versus granite?
Limestone is soft and low abrasion, so secondary and tertiary positions can run high chrome or high chrome with ceramic for maximum life. Granite is hard and highly abrasive, so you need a toughness plus wear balance from martensitic steel, martensitic with ceramic, or TiC reinforced high manganese. High chrome in primary granite is a frequent cause of breakage.
Can high chrome blow bars be used in primary impact crushers?
Only in low risk cases: small, soft, well screened feed with no tramp exposure, such as pre sized limestone. For hard rock primary duty, high chrome is generally the wrong choice because its toughness is too low for the impact energy, and it cracks instead of wearing.
What is the feed size limit for blow bars in secondary and tertiary crushers?
Secondary impact crushers typically accept feed from about 100 mm to 500 mm, while tertiary and sand making roles run fine feed, often under 150 mm and frequently under 50 mm. Smaller feed lowers the impact load and lets you select higher wear resistance such as ceramic composites.
How does tramp iron change blow bar selection?
Tramp iron forces a toughness first decision. If your circuit lacks reliable metal detection and magnetic separation, choose a tough matrix or bimetallic design and accept somewhat shorter wear life to avoid a catastrophic break that can damage the rotor.
Why do my blow bars keep breaking even though they are expensive?
Frequent breaks mean you are below the toughness floor for your feed size and stage, or your feed exceeds the crusher limits. Move up the toughness scale and verify feed size before changing hardness. A proper failure causes analysis will confirm whether the bar, the feed, or the installation is at fault.
Related Reading
– Blow Bar Failure Causes and Diagnosis