
Blow Bar Failure Causes: Breakage & Wear
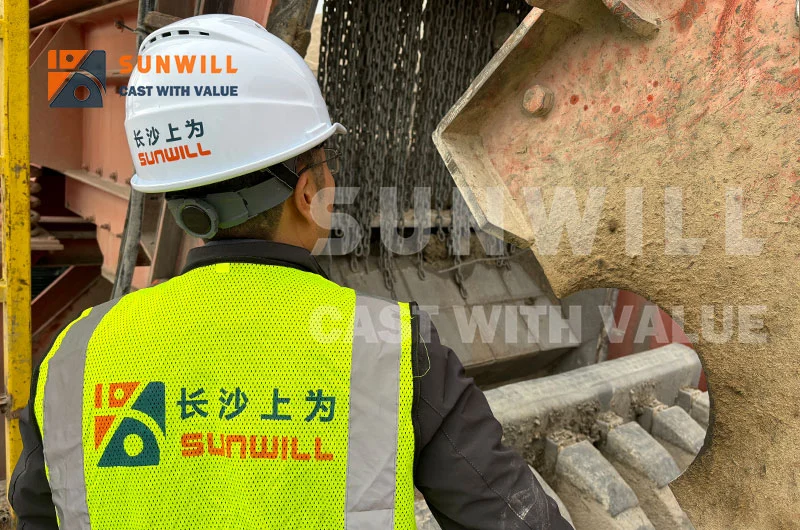
Common Failures of Impact Crusher Blow Bars & Their Causes
The fastest way to understand blow bar failure causes is to watch a production line go quiet. Last March, the night shift at a granite quarry in northern Spain started the primary impact crusher and heard a sound no operator wants. A single sharp crack, then a heavy thud against the housing. One high chrome blow bar had snapped at the edge, and the fragment tore through the curtain liner on the way out. The plant ran for nothing. No feed moved, no product shipped, and the maintenance crew spent the next 18 hours locking out the rotor, lifting the broken set, and fitting a replacement pair. At a 600 ton per hour site, 18 hours of downtime is a number that lands hard on the monthly report.
Blow bar failure causes almost always fall into three groups. There is breakage, where the bar cracks or shatters. There is failed fitment, where the bar will not seat and works loose. And there is premature wear, where the bar simply disappears faster than it should. Each group has a different root cause, a different warning sign, and a different fix. This article explains all three failure modes, shows how to match a symptom to its cause, and gives you a prevention checklist you can hand straight to your crew. If you run an impact crusher in a quarry, an aggregate plant, or a cement works, the patterns below will save you changeouts and shutdowns.
Understanding blow bar failure causes starts with the role of the part. The blow bar is the first thing the rock meets. It swings on the rotor at 1,000 to 1,600 rpm, strikes the feed, and either shatters it or wears against it. When the material choice, the fit, or the operation is wrong, the bar fails. The rest of this guide walks through exactly how and why that happens.
Key Takeaways
– Blow bar failures split into three modes: breakage, failed fitment, and premature wear, and each needs a different fix.
– Wrong material choice is the top cause of breakage, especially high chrome used in primary crushing of hard, coarse rock.
– Oversized feed and tramp metal, such as excavator teeth and liner fragments, cause edge fracture and shatter.
– Rotor pocket wear and wrong installation dimensions let bars seat poorly and loosen in service.
– Premature wear comes from material mismatch, casting defects, wrong rotor speed, tight apron gap, wet feed, and one sided feeding.
Why Understanding Blow Bar Failure Modes Matters
A blow bar is cheap. The stop around it is not. Most blow bar failure causes are preventable once you learn to read the warning signs. When a bar fails without warning, the whole crushing circuit behind it stops with it. Conveyors idle, screens idle, and the loaded trucks turn around at the gate. The lost tons never come back.
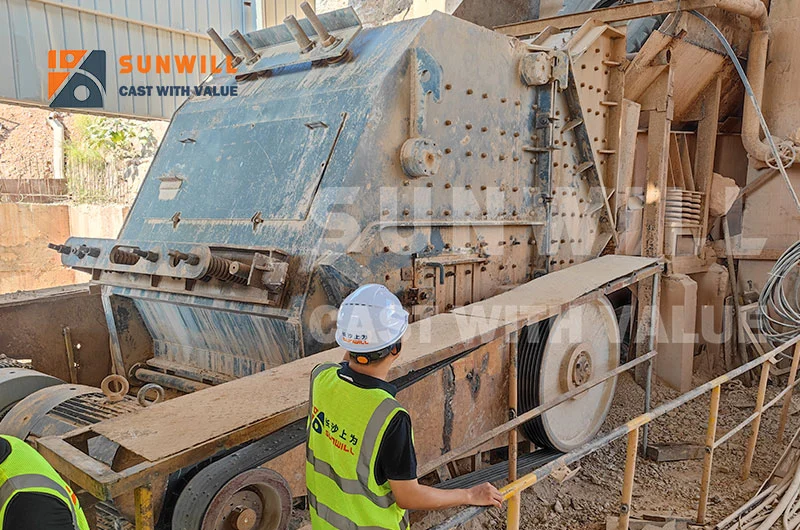
The money is bigger than most managers estimate. A stone crushing plant sitting idle can lose between $5,000 and $25,000 per hour in lost production, according to aggregate industry throughput data. A mid size quarry at 300 tons per hour typically burns $2,000 to $5,000 per idle hour, while a large premium aggregate site can lose $5,000 to $10,000 per hour. Multiply that by an 18 hour unplanned stop and you are looking at a five figure hit before you count the emergency freight and overtime.
The harder truth is that most of these stops are preventable. Industry maintenance data puts wear parts run past their limit among the leading causes of unplanned crusher downtime, and a large share of all stops trace back to preventable mechanical failures that inspection would have caught early. A blow bar rarely fails with zero warning. It cracks, it loosens, or it wears unevenly first. The crews that read those signs replace the part on a planned window instead of a midnight emergency.
Reactive maintenance also costs more per part. Emergency air freight, premium labour, and a rushed install that seats badly all stack on top of the lost production. Planned maintenance, by contrast, lets you weigh match the set, torque to spec, and restart on schedule. The gap between the two approaches is the difference between a controlled cost and a crisis.
If you want the symptom to root cause map first, our impact crusher wear troubleshooting guide walks the full loop. For the material side of the decision, our blow bar material specifications and composition guide breaks down what each grade resists.
Key Points
– One unplanned stop can cost five figures in lost production alone, before parts and labour.
– Most blow bar failure causes show a warning sign (crack, looseness, uneven wear) hours or days before they stop the line.
– Planned replacement beats reactive emergency response on cost, freight, and install quality.
Failure Mode 1: Breakage (Blow Bars That Shatter or Crack)
Breakage is the failure mode that scares operators, because it is loud, sudden, and destructive. Among the blow bar failure causes plants report, breakage does the most visible damage. A bar that snaps at the edge can take the curtain liner and even the housing with it. Breakage is also the most avoidable mode, because it almost always traces to a mismatch between the bar and the job it was asked to do.
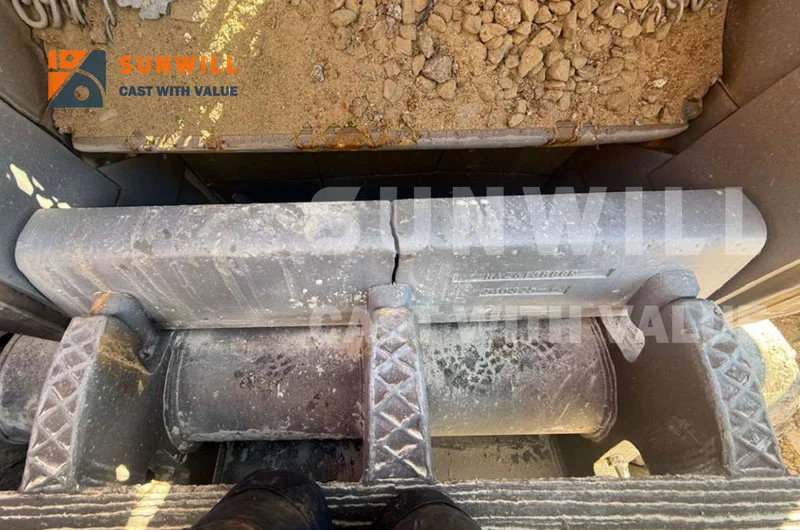
Signs of Impending Breakage
Breakage rarely arrives with no notice. These are the early markers that separate normal wear from the blow bar failure causes that stop a line. Watch for them during daily inspection:
- A hairline crack across the waist or along the back of the bar.
- Chipping at the leading edge that grows between shifts.
- A bar that has worn thin in the middle while the ends stay thick.
- A metallic ringing or hammering sound at speed that was not there last week.
- Opposite bars wearing at clearly different rates with centred feed.
None of these is a death sentence on its own. Together, or when ignored, they lead to a full fracture. The moment you see a crack, the bar belongs in the scrap pile at the next window, not back in the rotor.
Root Cause 1: Material Mismatch for Impact Load
The single most common blow bar breakage cause, and the root of more blow bar failure causes than any other single choice, is picking a bar that is too brittle for the impact it absorbs. High chrome white iron is a brilliant wear material in the right place. It is hard, it resists abrasion, and it holds an edge. It is also brittle. Hit it with a coarse, hard rock at primary stage and it can fracture instead of wearing.
High chrome loves secondary and tertiary duty on limestone and similar soft stone. It hates primary duty on granite, basalt, or recycled concrete loaded with rebar. In primary crushing the feed is big, the impact is violent, and the bar needs to absorb energy without cracking. That is the job of a tough martensitic or ceramic reinforced grade, not a brittle white iron.
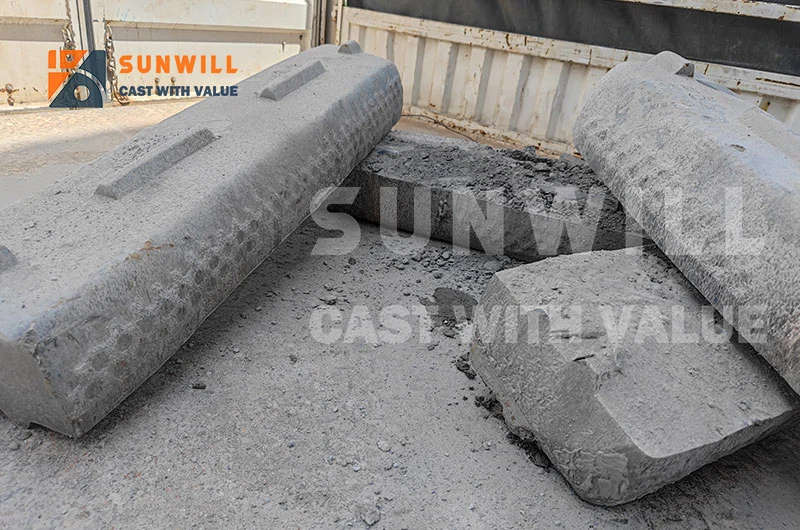
Here is the pattern we see again and again. A purchasing manager buys on price per kilo, sees that high chrome is cheap and hard, and specs it for the primary crusher because the catalogue says “wear resistant”. Three weeks in, bars start snapping at the edge. The plant blames the foundry. The real fault is the match.
A purchasing manager at a hard rock operation in Turkey told us his team standardised on a Cr20 high chrome bar for a primary impact crusher fed with coarse granite. The first bar broke inside 11 days. A second broke at 16 days. After the third fracture shut the line for a shift, they switched to a tougher ceramic reinforced martensitic grade and ran the same feed for the rest of the season without a single breakage. The lesson was simple. Match the bar to the impact, not to the price list.
For hard rock specifically, our hard rock quarry blow bar selection guide explains how abrasion index, silica content, and rotor speed combine to pick the right grade. Material choice is the first lever and the biggest one.
Root Cause 2: Oversized or Unbreakable Feed Material
The second breakage cause, and one of the blow bar failure causes no foundry can design around, is feed the crusher was never built to hit. Every impact crusher has a maximum feed size. Push stone through that is larger than the pocket accepts and the bar takes a blow far beyond its design load. The edge cracks, then the crack runs.
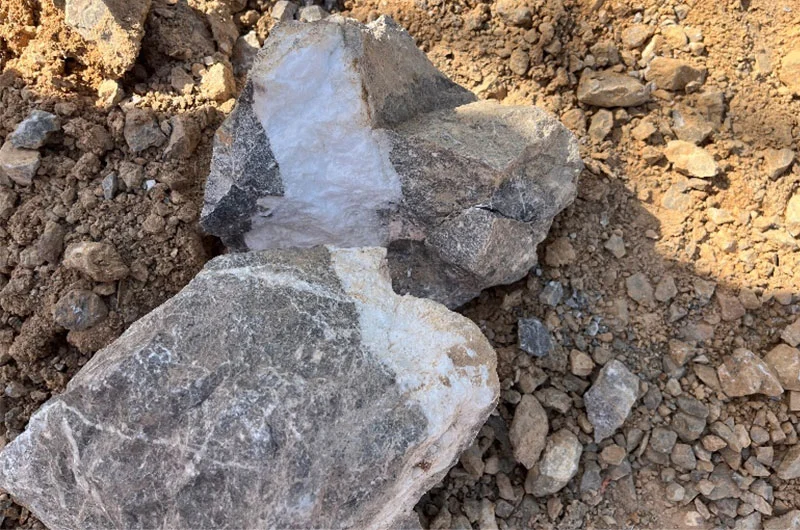
Oversize feed does two bad things at once. It raises the peak impact force on the leading edge, and it changes the strike point so the load lands where the bar is thinnest. Repeat that for a shift and the edge lets go. The fix is upstream, not in the foundry. Pre screen the feed, set the grizzly correctly, and keep boulders out of the box.
The worse case is tramp metal. Excavator teeth, bucket adapters, crusher backing, or loose liner plates that fall into the feed are unbreakable. They do not crush, they do not yield, and they hit the bar like a steel hammer. A single excavator tooth can shatter a bar and damage the rotor. The defence is magnetic separation and a metal detector ahead of the crusher, plus a loader operator who sorts obviously contaminated material before it loads.
One site we advised had repeated bar fractures every few weeks with no pattern in the rock. The common factor turned out to be a worn bucket tooth on the loading excavator that dropped into the hopper roughly once a shift. A magnetic head pulley on the feed conveyor ended the breakages. The bars were never the problem, and tramp metal is one of the blow bar failure causes that hides in plain sight.
Root Cause 3: Design and Manufacturing Defects
The third of the blow bar failure causes lives in the bar itself. A poorly designed blow bar with a very thin wear face concentrates stress at the transition into the back. Under repeated impact that thin section cracks. A bar with a thin waist, the narrow section behind the wear face, is also weak, and it becomes weaker as it approaches the end of its life and the waist thins further.
Casting defects make the problem worse. A bar with an internal crack from pouring, a shrinkage cavity, porosity, or substandard toughness breaks early no matter how good the grade looks on paper. These are not wear problems. They are quality problems, and they show up under load.
This is where foundry discipline matters. A bar should be poured, heat treated, and inspected so that what leaves the works is sound. At SUNWILL we cast impact bars under ISO 9001:2015 controls, weight match each set so the rotor stays balanced, and verify toughness and soundness before the crate closes. Our TiC reinforced high manganese steel blow bars are a separate product line built for high impact and high abrasion service, not a standard Hadfield casting. For Ni Hard (ASTM A532) duty we specify and source the correct grade for the working condition rather than treat it as a stock item. For tungsten carbide composite or hardfaced overlays we treat them only as a comparison option, not as a SUNWILL supplied product line. The principle behind all of it is the same. We CAST WITH VALUE, which means the part that arrives is the part the drawing promised.
Key Points
– Breakage is usually a mismatch, not a mystery: brittle grade plus high impact equals fracture.
– Oversize feed and tramp metal (excavator teeth, liner fragments) cause edge fracture and shatter.
– Thin waist or thin wear face design and internal casting defects turn a good grade into a breaking bar.
– Match the grade to the duty, control the feed, and buy from a foundry that inspects what it ships.
Failure Mode 2: Failed Fitment (Blow Bars That Will Not Seat Properly)
Failed fitment is the quiet failure mode. Of all blow bar fitting problems plants report, poor seating is the most common and the most misdiagnosed. The bar does not break and it does not wear out fast. It simply will not sit right in the rotor pocket, so it moves, hammers, and loosens until it either walks out or chews the pocket. Fitment problems are the most common reason a “good” bar fails early for no visible wear reason.
How Rotor Wear Creates Fitment Problems
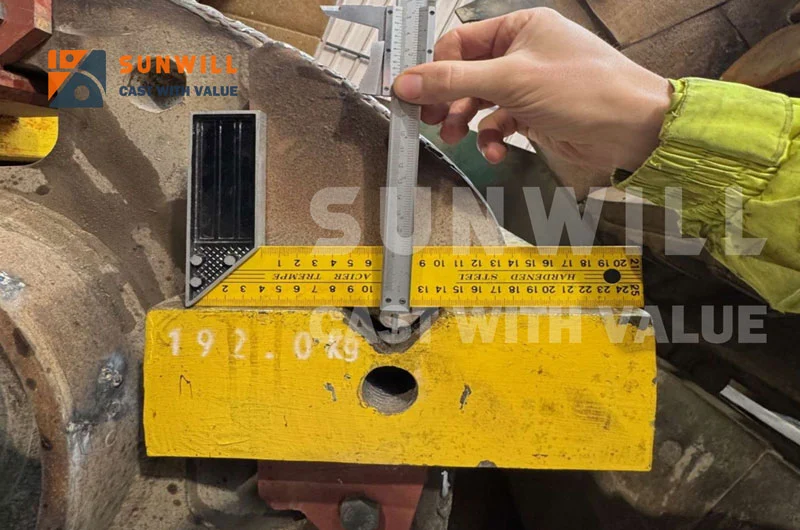
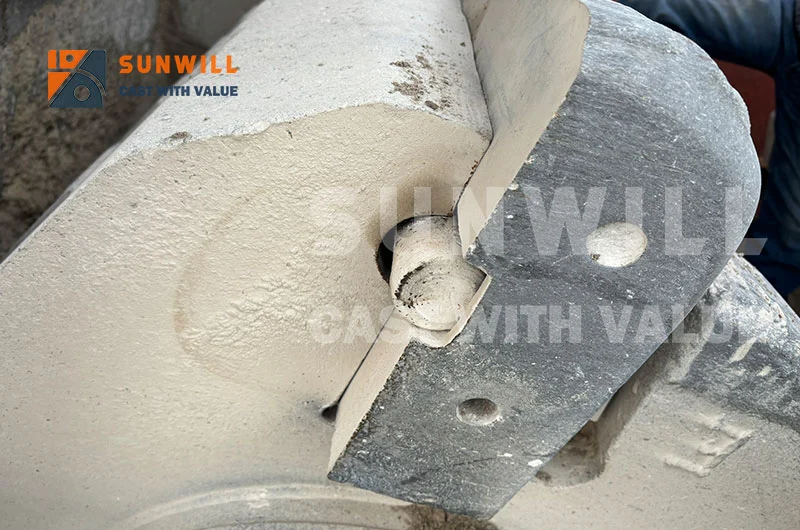
The rotor pocket is the machined seat the bar drops into. Over thousands of hours the pocket itself wears. The flat surfaces that locate the bar go out of true, the wedges lose grip, and the bar can rock slightly in its seat. A rocking bar hammers the pocket every revolution, which wears the pocket faster, which looses the bar more. Left alone, the loop destroys both the bar and the rotor.
The sign is distinct. You hear a rhythmic knocking at speed that rises with rpm. You see the bar sitting proud of its neighbours, or a wedge that needs re tightening every shift. The cure is to measure the pocket, rebuild or build up the worn locating faces, and only then fit new bars. Fitting fresh bars into a worn pocket just transfers the problem to the new set.
Installation Dimension Errors That Cause Loosening
Even with a sound pocket, wrong installation dimensions let a bar work loose. Most blow bar fitting problems start with a bolt torqued by feel. The most common errors are simple and repeatable:
- Bolt torque applied by feel instead of to spec, so one bolt is tight and the rest are not.
- Bolts torqued in the wrong sequence, which twists the bar and leaves a gap at one corner.
- Shims or wedges missing or fitted backwards, so the bar has room to move.
- Mating faces left dirty, with scale or old compound between the bar and the pocket.
- Opposite bars fitted at different depths, so the rotor is out of balance.
A loose bar does not stay loose for long. It hammers, it erodes its own seat, and it throws imbalance into the rotor that you feel as vibration. The chain reaction ends with a bar that walks out or a pocket that needs rebuilding. None of it is the grade’s fault.
A maintenance lead at a limestone plant described the cycle to us. His crew reused bars from two different sets, skipped the torque sequence, and buttoned up the crusher to catch production. Within two shifts a bar was knocking. By the end of the week the pocket had a visible groove and the new bar was scrapped. After they adopted a written torque sequence, cleaned every mating face, and weighed matched the set, the knocking stopped and the next three sets ran to full wear. The part was fine. The install was not.
For the step by step method, our blow bar replacement procedure gives the lockout, seating, and torque sequence your crew should follow every time.
Key Points
– A worn rotor pocket lets a bar rock and hammer, which wears the pocket faster in a vicious loop.
– Loose fitment comes from wrong bolt torque, wrong sequence, missing shims, and dirty mating faces.
– Clean the pocket, torque to spec in sequence, and weigh match opposite bars before restart.
Failure Mode 3: Premature Wear Life (Blow Bars That Wear Out Too Fast)
Premature wear is the failure mode that bleeds budget slowly. The impact bar premature wear reasons are almost always a mix of wrong material and wrong operation. The bar does not break and it does not fall out. It just wears through in half the hours it should, so you change it twice as often, pay twice as much, and lose the changeout windows. Premature wear is almost always a combination of wrong material and wrong operation.
Material Abrasiveness Mismatch
The first cause of fast wear is a bar that is too soft for the rock. Abrasion is driven by the hardness and silica content of the feed. High silica rock, granite, basalt, and quartzite chew through a soft bar fast. A standard martensitic bar that gives 800 hours on limestone may give 200 to 300 hours on granite, because the wear rate climbs three to five times. That gap is the clearest sign of impact bar premature wear reasons at work.
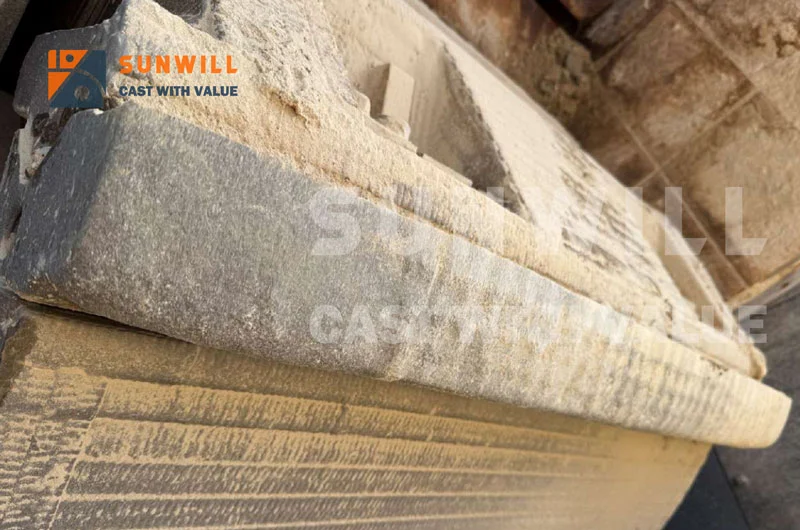
The fix is to step up the grade. For highly abrasive natural stone, a high chrome or ceramic reinforced composition resists the surface degradation that ends a soft bar early. Ceramic reinforced bars cost more up front but can extend life two to four times, which drops the cost per ton even after the higher purchase price. Choosing the grade by abrasion, not by habit, is the whole game.
Our blow bar selection guide by feed size and material maps rock type to the grade that holds up. When the rock is genuinely hostile, our hard rock quarry blow bar guide goes deeper on silica and abrasion index.
Casting Quality Issues
The second cause of fast wear, and one of the impact bar premature wear reasons plants underestimate, is a bar that was never sound. Internal defects, such as porosity, inclusions, or a weak ceramic bond in a ceramic reinforced bar, open a fast track for wear. A weak ceramic bond lets the inserts pull out under impact, leaving pits that the rock then widens. A bar with soft spots from poor heat treatment wears unevenly and loses its edge early.
This is why supplier quality control is not a nice to have. A bar should be poured, heat treated, and inspected so the wear face is uniform and the ceramic is bonded. At SUNWILL we CAST WITH VALUE, which for ceramic reinforced bars means verifying the bond and the hardness before the set ships, so the wear you see in the field matches the spec on the drawing. A bar that wears half as long as its grade promises is usually a quality problem wearing a good grade’s name.
Operational Factors
The third cause of premature wear is how the crusher is run. Four operating habits are among the blow bar failure causes that quietly cost you hours, and all four are under your control.
Rotor speed too high. Higher rotor speed means more impacts per minute and more energy per hit. That raises fines, but it also raises wear. Running the rotor faster than the rock needs accelerates wear without buying much product benefit. Drop to the lowest speed that still meets gradation and the bars last longer.
Apron gap set too tight. A tight apron gap forces the rock to be struck and re struck instead of clearing. The bar grinds the same material over and over, which is pure abrasion with no benefit. Set the gap to the product spec, not tighter, and check it for drift. Our apron gap setting guide shows the numbers to target.
High water content in the feed. Wet feed accelerates wear through a simple mechanism. Water carries fine abrasive slurry that scrubs the bar face, and sticky material builds up in the box, raising impact force. Feed moisture above about 8 percent starts to shorten life, so control dust suppression to what is needed and keep clay out where you can.
Uneven feeding. One sided feed is the most overlooked cause of premature wear. When material lands on one side of the rotor, the bars on that side take the load and wear thin while the other side stays fresh. The set fails early on one end, the rotor goes out of balance, and you change the whole set for one sided damage.
A sand and gravel plant we worked with was changing bars every three weeks and blaming the supplier. The real cause was the feeder. The belt loaded off centre, so the right hand bars wore to the limit while the left hand bars looked almost new. After they levelled the feeder pad and centred the load, the same bars ran six weeks, and the rotor stopped shaking. The supplier was innocent. The conveyor was guilty, and one sided feed is among the blow bar failure causes the foundry gets blamed for.
Key Points
– Fast wear starts with a bar too soft for the silica and hardness of the feed.
– Internal defects and weak ceramic bonding open pits that the rock widens fast.
– High rotor speed, tight apron gap, wet feed, and one sided feeding all shorten life and are all controllable.
Diagnosis Framework: Matching Symptoms to Root Causes
When a bar comes out early, do not guess. Read the failure and trace it back. Sorting impact crusher blow bar failure modes by symptom is faster than swapping parts blind. The table below maps the symptom you see to the mode and the likely root cause, then to the first action.
| What you see | Failure mode | Likely root cause | First action |
|---|---|---|---|
| Bar snapped at the edge or shattered | Breakage | Oversized or unbreakable feed, or grade too brittle | Stop, clear tramp, review material choice |
| Crack across the waist | Breakage | Thin waist design, end of life, low toughness | Replace the pair, review grade and foundry |
| Bar knocks and sits proud of the pocket | Failed fitment | Worn rotor pocket or wrong bolt torque | Lock out, measure pocket, re seat and torque |
| One side worn thin, other side fresh | Premature wear (uneven) | One sided feed, off centre loader | Centre the feeder, rotate or flip bars |
| Uniform but fast thinning | Premature wear | Grade too soft for abrasion | Upgrade to ceramic reinforced or high chrome |
| Pitted face with pulled out ceramic | Premature wear or casting | Weak ceramic bonding | Review supplier quality control |
The loop is the same every time. See the symptom, name the mode, find the root cause, then fix the cause rather than just the part. Mapping blow bar failure causes to modes is the fastest path to a real fix, not a guess. Replacing a bar without fixing the feed, the speed, or the pocket just buys a few more weeks before the next early failure.
If the symptom is not obvious, our wear failure analysis guide shows how to read a failed part and confirm the mechanism. That step stops you from buying the wrong upgrade.
Key Points
– Name the mode first: breakage, failed fitment, or premature wear.
– Match the visible symptom to the root cause before you order a replacement.
– Fix the cause, not just the part, or the next set fails early too.
Prevention Strategies
Good blow bar life is built before the bar goes in. The blow bar failure causes above share one theme: the bar was asked to do a job its setup could not support. The checklist below covers the five controls that prevent most failures.
1. Choose the material by the job. Match the grade to the feed hardness, silica, and impact. Soft rock secondary duty can run a martensitic or medium chrome bar. Hard rock primary duty needs a tough ceramic reinforced or martensitic grade. Do not spec a brittle high chrome bar where it will be hit hard. Use our blow bar material specifications guide to confirm the chemistry.
2. Control the feed. Pre screen to remove oversize, set the grizzly to the crusher limit, and keep tramp metal out with a magnet and a metal detector. Sort obviously contaminated material at the loader. Feed size is a direct blow bar breakage cause, so the hopper is where breakage is prevented.
3. Install to spec every time. Clean every mating face, fit shims and wedges correctly, and torque the bolts in the written sequence to the value in the manual. Weigh match opposite bars so the rotor stays balanced. Follow the blow bar replacement procedure without shortcuts.
4. Set the machine right. Wrong settings are blow bar failure causes you can switch off today. Run the rotor at the lowest speed that meets gradation. Set the apron gap to product spec and check it for drift. Keep feed moisture under control and centre the load so wear spreads across the full bar width. Small setting errors are large wear errors over a season.
5. Inspect on a schedule. Check bars daily for cracks, looseness, and uneven wear. Measure thickness on a grid every 100 operating hours. Replace at the wear limit, not after breakage. Log vibration, temperature, and current so a slow drift shows before it becomes a stop.
A plant that runs all five controls typically extends blow bar life and cuts unplanned stops at the same time. The bars last longer because the causes of early failure are removed, not because a more expensive part was bought.
Key Points
– Prevention is five controls: material match, feed control, correct install, right settings, and scheduled inspection.
– Most blow bar failure causes are removed upstream of the foundry, at the hopper, the feeder, and the torque wrench.
– Log the data so a slow drift becomes a planned window, not a midnight emergency.
Conclusion
Blow bar failure causes come down to three modes and a short list of roots. Breakage comes from a brittle grade under hard impact, oversize or unbreakable feed, or a poorly designed and defectively cast bar. Failed fitment comes from a worn rotor pocket and sloppy installation. Premature wear comes from a soft grade, internal defects, high rotor speed, a tight apron gap, wet feed, and one sided loading.
The good news is that every one of those roots is controllable. Track your blow bar failure causes by mode and the pattern becomes predictable, not a surprise. Match the material to the rock, control the feed, install to spec, set the machine right, and inspect on a schedule. Do those five things and the bars you buy will deliver the hours they were designed for.
Ready to pin down the right grade for your machine and your rock? Our SUNWILL blow bar material codes guide translates your duty into a specific code, and our hard rock blow bar guide covers granite, basalt, and quartzite in detail. If you want an engineer to walk your symptom to a root cause, contact our team with your machine model and wear photos. We will CAST WITH VALUE into the set that fits the job, so your next changeout lands on the planned clock and not in the middle of a shift.
ceramic insert blow bars## Standards and Authoritative References
- ASTM A532 / A532M-22(2022), Standard Specification for Abrasion-Resistant Cast Irons – the issuing body for the Ni-Hard Type 1/2/4 designations referenced in this article.
selecting wear material by abrasion index
Frequently Asked Questions
Why do blow bars break instead of wearing down?
Breakage is a toughness failure, not a wear failure. A bar breaks when the impact load exceeds what the grade and the design can absorb. The usual triggers of blow bar breakage causes are a brittle grade (such as high chrome) in primary crushing, oversize or unbreakable feed, a thin waist or thin wear face, and internal casting defects. Wear down, by contrast, is a gradual loss of the face from abrasion. If your bars are cracking rather than thinning, the cause is impact and fit, not abrasion.
What causes blow bars to loosen in the rotor?
Loose bars come from failed fitment. Most blow bar fitting problems trace to a worn pocket or a careless install. The two main sources are a worn rotor pocket that no longer locates the bar, and an installation done by feel rather than to spec. Wrong bolt torque, the wrong tightening sequence, missing shims, and dirty mating faces all leave the bar room to move. Once it moves it hammers, which wears the pocket faster and loosens it more. Measure the pocket and torque to the written sequence to stop the loop.
How do I know if my blow bars are wearing too fast?
Compare the hours you got to the expected range for your rock. Limestone secondary duty often runs 800 to 1,000 hours, while granite may run 700 to 1,000 and quartzite 500 to 700. If you are at half those numbers with no obvious abuse, the likely causes are a grade too soft for the abrasion, internal casting defects, rotor speed too high, apron gap too tight, wet feed, or one sided loading. Read the wear pattern to find which one. These impact bar premature wear reasons are all under your control, so the fix sits in the settings and the feed rather than the foundry.
Can oversized feed really break a blow bar?
Yes. Every impact crusher has a maximum feed size, and stone above that limit hits the bar with force beyond its design load, usually at the thin leading edge. The edge cracks, then the crack runs. Tramp metal is worse. An excavator tooth or a loose liner plate is unbreakable, and a single piece can shatter a bar and damage the rotor. Pre screen the feed and run a magnet plus a metal detector to keep both out. These blow bar failure causes are mechanical and cheap to remove, so the defence pays for itself in one saved stop.
Does high moisture in the feed shorten blow bar life?
It does. Feed moisture above roughly 8 percent raises wear through two paths. Water carries a fine abrasive slurry that scrubs the bar face, and sticky material builds up in the box, which raises impact force. Control dust suppression to what is actually needed and keep clay out where possible. Dry, well graded feed is easier on the bars than wet, sticky feed. Among the impact bar premature wear reasons, water is the one operators forget to control.
What is the correct torque for blow bar bolts?
The value depends on the machine and the bolt size, so use the figure in your service manual rather than a generic number. The method matters as much as the value. Torque in the specified sequence, not all at once, and re check after the first short run as the bars seat. A bar tightened by feel will be loose by the next shift. Our blow bar replacement procedure lists the sequence to follow.
How often should I rotate or flip blow bars?
Rotate or flip when one end reaches about 40 to 50 percent wear, which uses both working faces and can extend usable life by 30 to 50 percent. Only rotate within a balanced set, and always change opposite bars as a pair. Cleaning the mating faces during rotation keeps metal on metal contact and prevents the loosening that shortens life. Log the wear each time so the next interval is planned.
Which blow bar material should I use for granite?
Granite is hard and high in silica, so it needs a tough, abrasion resistant grade. A ceramic reinforced martensitic bar or a high chrome bar in secondary and tertiary duty performs well, while primary duty favours the tougher ceramic reinforced option over brittle high chrome. Avoid a soft martensitic bar, which can wear out in 200 to 300 hours on granite. Material choice is the first of the blow bar failure causes to get right, so do not leave it to habit. Our hard rock quarry blow bar guide maps the full choice by rock and stage.